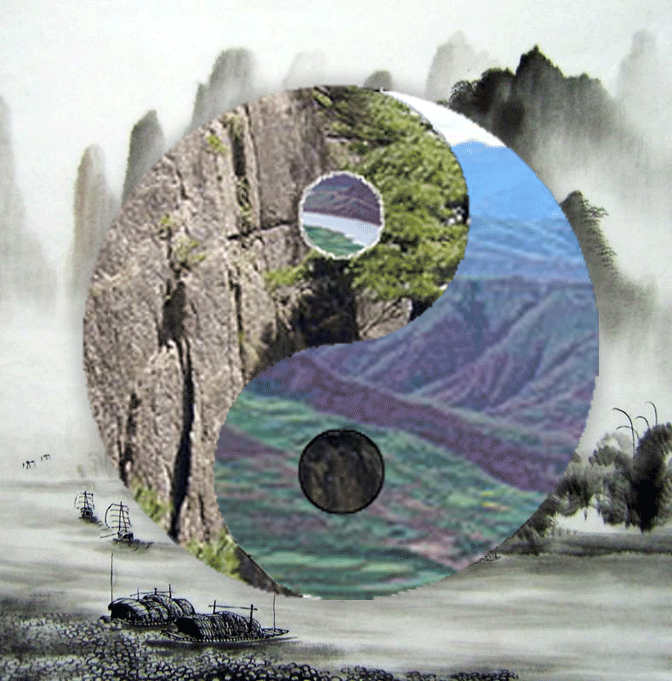
Yin/Yang GIF: This was an image based on the Chinese concept of Yin Yang where opposites in nature are in balance. Yin, the white, is filled in with the image of the farmland and sky; Yang, the black, is filled in with the image of a mountain. This was done by getting a picture of Yin/Yang, a Chinese mountain scene, and a Chinese farmland scene, and making the latter two into patters by going to Edit --> Define Pattern. Then, the pen tool or lasso tool were used to select either the Yin portion or the Yang, and then were filled (Edit --> Fill) with with the sky and mountain scene respectively. The portions of Yin in Yang and Yang and Yin were also filled with the patterns and then stroked (Edit --> Stroke) with a one pixel brush of either black or white. Then, the magnetic lasso tool was used to outline the Yang portion, which was then placed on a separate layer (Cntrl + J) and then flipped vertically (Edit --> Transform --> Flip Vertical). The same was done to the Yin portion. To animate it, the animation toolbar was opened (Windows --> Animation (Ps2)/ Timeline (Ps4)). The first frame was the original upright Yin/Yang image; the second frame was the Yin/Yang image flipped vertically. Between the frames, there was a tween of 20 frames with just the effect of preserving opacity to gain the look of faded rotation in the GIF.
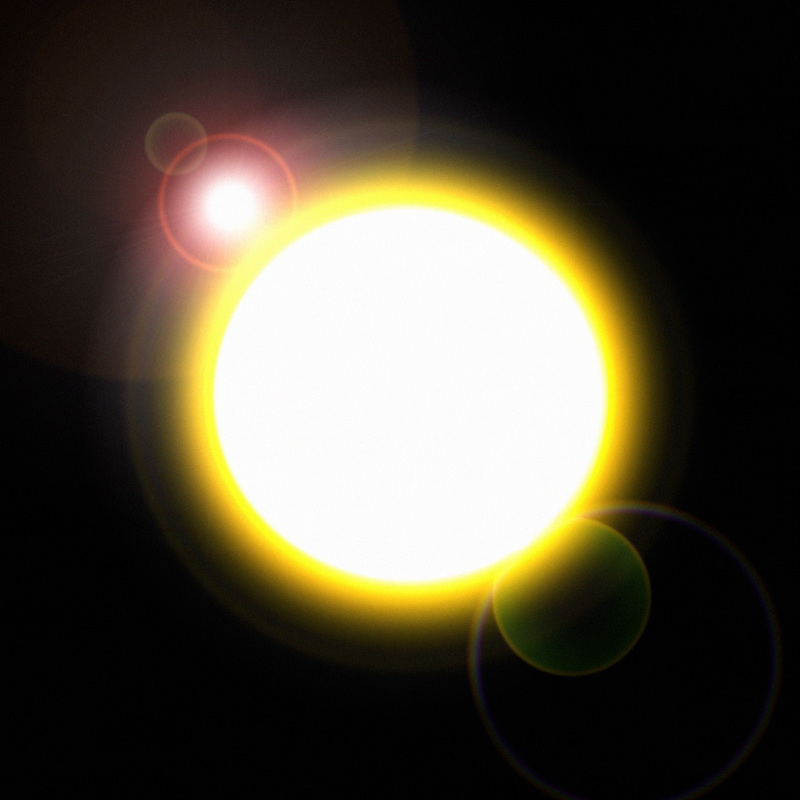
Sun Creation (from scratch) JPEG: This work was based on my creation of a sun for the Workpath project (Project 8). On a black background, a new layer was created, and the elliptical tool was used to create a yellow circle to represent a sun. On the layer of the sun, an outer glow was used, and a gradient was created for the Outer Glow, going from yellow to black. Additionally, along with an Outer Glow, the sun received an Inner Glow of white as well as a slight Bevel and Emboss. Then, going to Filter, a slight Gaussian blur was added, but then the image was given a realistic look of the light spreading by adding Noise. A Lens Blur was added, and then a spotlight (on the top) and Lens Flare was added to the image to make it look similar to being viewed through a camera.
